
![]() As we continue with our 12 Tips of (ContentBox) Christmas, we at Ortus Solutions are giving you a gift of developer productivity, we will share a few tips and tricks that will keep giving all year around. Brad Wood is also doing 12 Tips of (CommandBox) Christmas.
As we continue with our 12 Tips of (ContentBox) Christmas, we at Ortus Solutions are giving you a gift of developer productivity, we will share a few tips and tricks that will keep giving all year around. Brad Wood is also doing 12 Tips of (CommandBox) Christmas.
If you have been following along, we have provided a lot of solid tips for using ContentBox, but one of the big ones, is how to migrate to ContentBox. Luckily, we have you covered. You can import from WordPress, Mango, MachBlog and BlogCFC from the Import Tools.
Importing from another Blog System
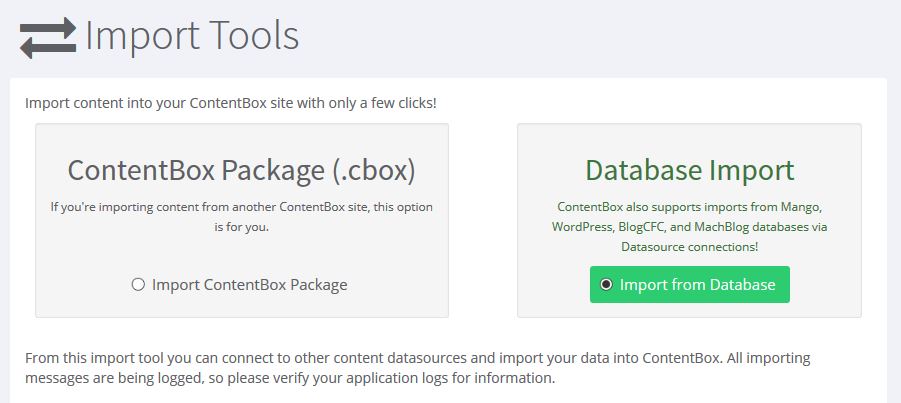
To get to the Import Tools, in the admin, click on Tools > Import.
The Import Tools page displays 2 main options, ContentBox Package ( .cbox ) or Database Import. In Tip 10, we talked about importing from a ContentBox package, but in this tip, we are going to click Import from Database and then enter your database connection criteria to complete the import.
Datasource Options
This server must have a defined datasource to the source blog database in order to import it. Please make sure this datasource exists in the ColdFusion administrator. If you have not done this yet, please login into your ColdFusion Administrator ( or Lucee admin ) and setup the datasource for the database you wish to import.
Enter the Datasource name that you created, and Username/ Password if required.

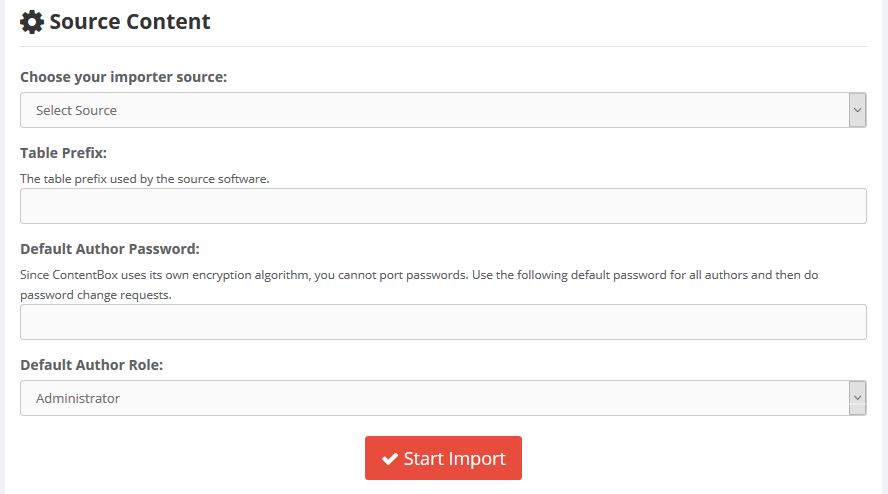
Source Content
- Next we have to choose the type of data you are importing, and any special setup you might have used.
Select the Importer Source - Mango, WordPress, BlogCFC or MachBlog ( please let us know if your CMS is not on this list and would like us to enter it )
- Table Prefix - when installing the blog, some blog software allow you to select a table prefix. To import your data correctly, we need to know what Prefix the database is using.
- Default Author Password - Since systems encrypt passwords, we cannot simple copy them over, we need to create new ones. Please enter a default author password to set this as the default, and then you can modify them once they are imported into ContentBox.
- Since Roles are not the same between blogs, please select the default Author Role you wish to use for Authors imported through this process. You can manually change them after the import.
When you are all set, click Start Import, and be patient.
This process might take some time.
Note: We have worked hard to make sure this process is as smooth as possible.
There may be some data that does not transfer over automatically, but this should give you a great starting point, if converting from another blog.
Remember, always back up your data and files before doing imports like this, to be sure… and never do this in production.
It pays to do this on a developer version of your site.
Come back for the last tip, - 'Installing ContentBox in seconds' to see how you can be up and running ContentBox right away.


Add Your Comment