
After using the ColdBox MVC Platform or any of the Box libraries you might think of an enhancement or new feature you'd like to see. Or perhaps you found an issue, and after posting it to our Google Group, we asked you to put in a ticket. Well, today is you day because here is a step by step guide for getting set up in our bug tracker so you can enter tickets, as well as comment, vote, or watch other people's tickets. Out open source libraries are developed out in the open for full transparency and to encourage the public to join in and be part of the exciting process.
Atlassian JIRA
Atlassian has created a number of development workflow tools like BitBucket, SourceTree, and Bamboo. JIRA (pronounced Jeer-ah) is their popular system for bug tracking and does lots of cool stuff with agile plugins. The URL for the Ortus JIRA bug tracker is (We'll wait while you bookmark it):
https://ortussolutions.atlassian.net/browse/COLDBOX/
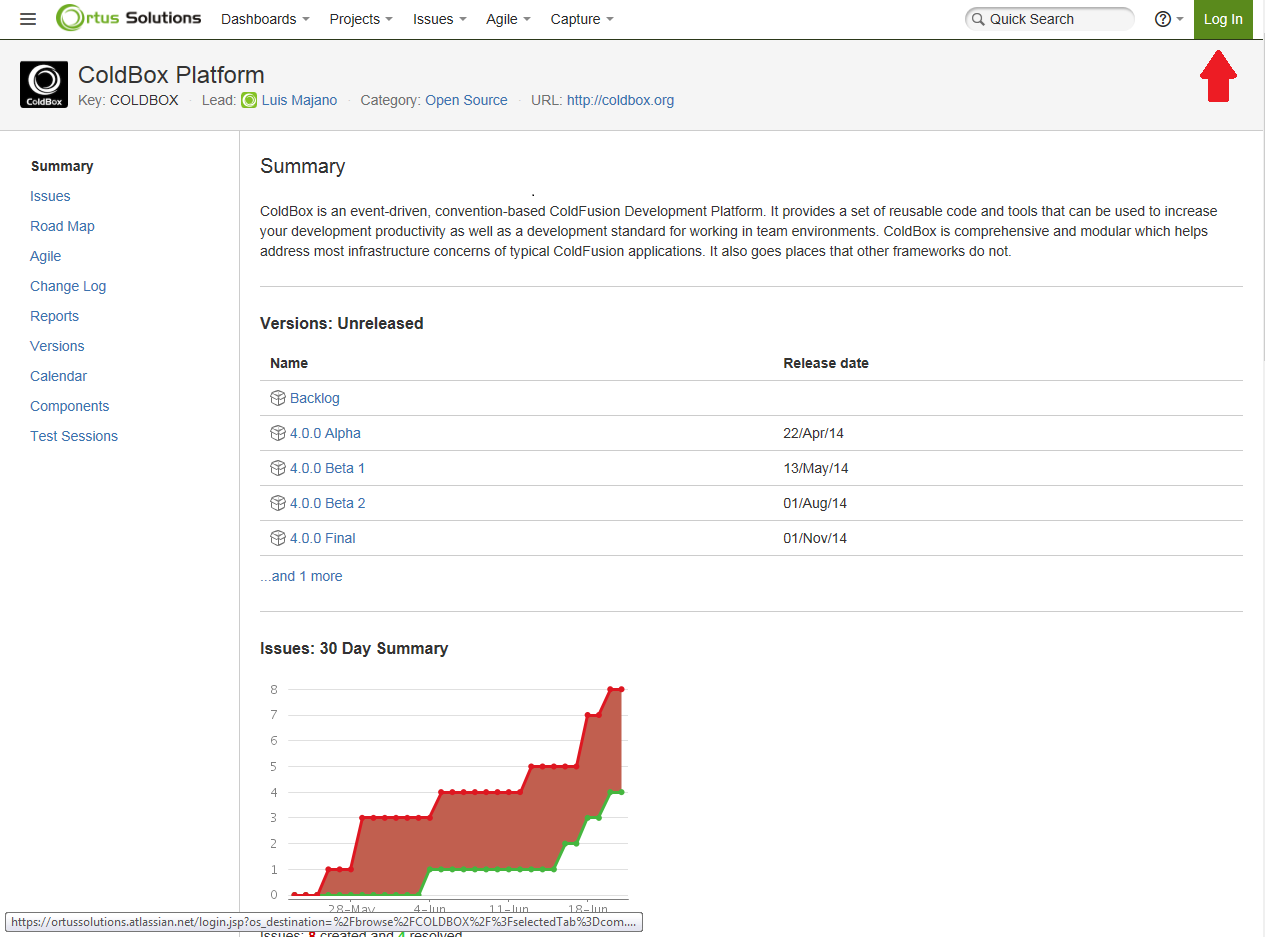
When you first visit, you'll see something like this. From a non-logged in state you can still view tickets and read comments but you can't create tickets or interact with existing ones. Start by hitting the green "Log In" button in the upper right hand corner of the screen.
Not logged in (click to enlarge)
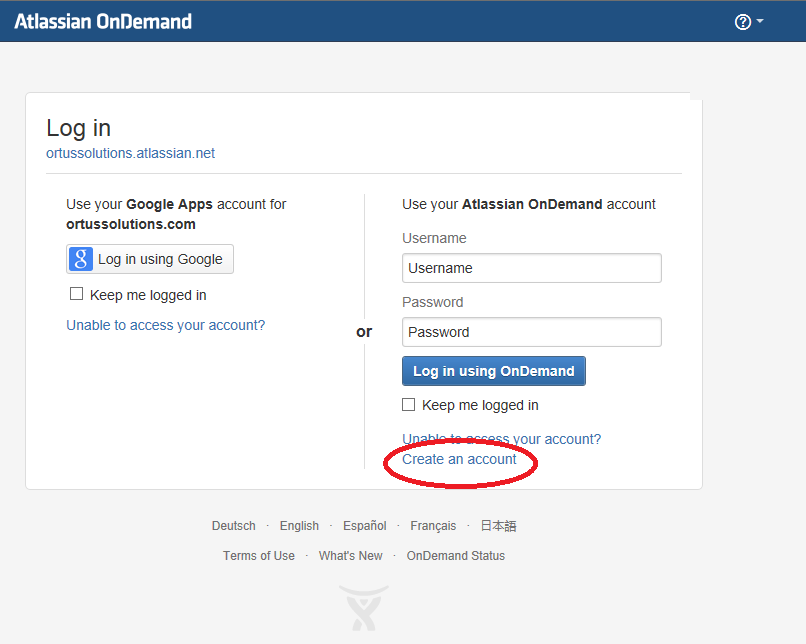
On the log in form, click the "Create an account" link on the right hand column under the username and password fields. Don't be tempted to use the "Log in using Google" option. That only works if your E-mail address ends in @ortussolutions.com!
Log in form (click to enlarge)
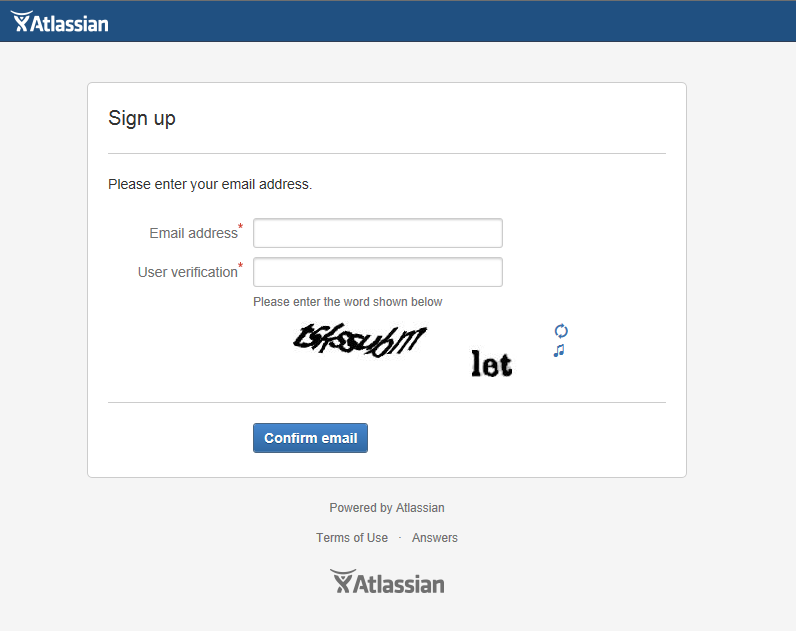
The next screen kicks off the signup process by collecting your E-mail address and asking you to type in a verification code to ensure you're not a bot. This is the E-mail address that you'll receive ticket updates at. When you've typed in your info, click the "Confirm email" button.
Enter E-mail Address (Click to enlarge)
Once you've done that you'll see a confirmation screen like so.
E-mail Confirmation (Click to enlarge)
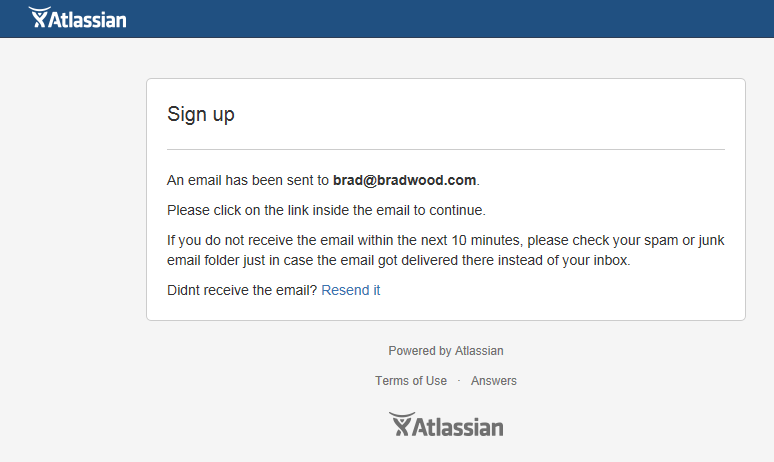
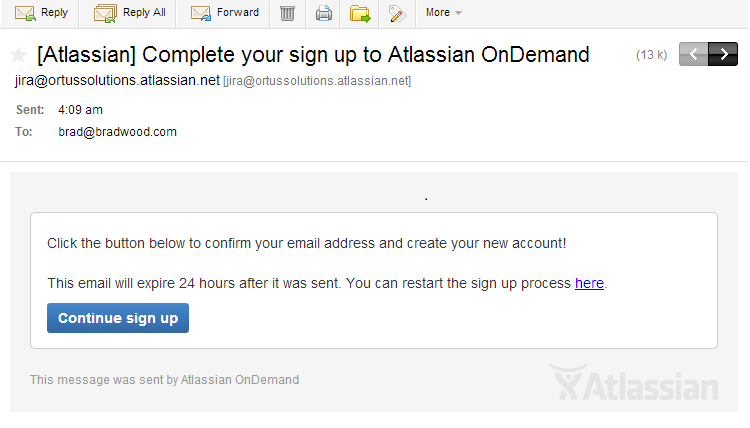
Now, it's time to go check your mail. Mine arrived in just a minute or so. Click the blue "Continue sign up" button in the message to continue the process.
You've got mail! (Click to enlarge)
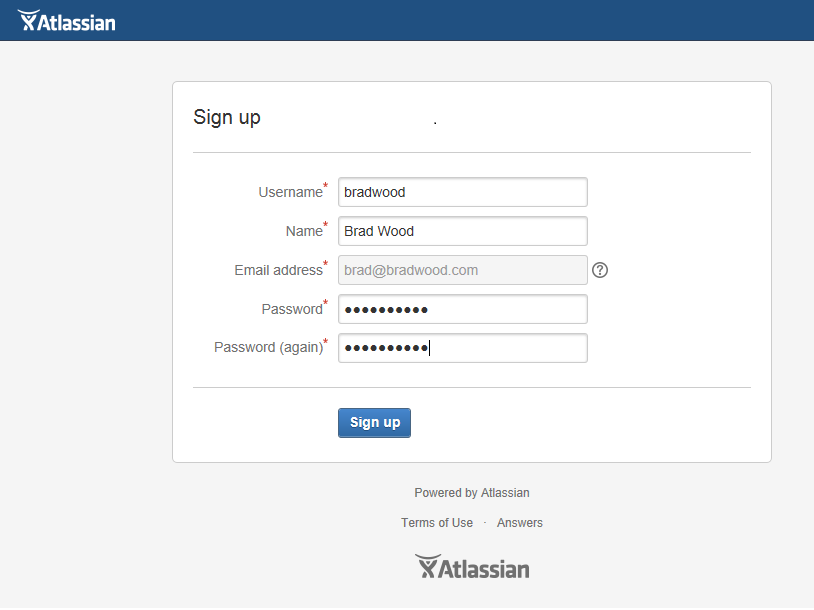
You'll be taken back our site and get the final half of the sign up form. Now you're cooking with gas! Fill this out and click the blue "Sign up" button.
Sign up form (Click to Enlarge)
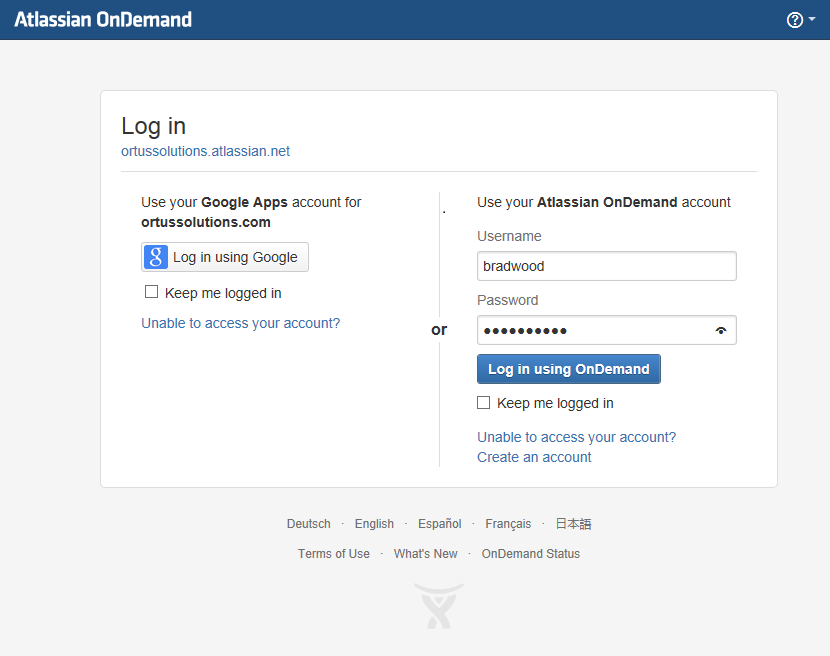
Now that you've created your account, put your shiny new username and password into the Login form and click the blue "Lot in using OnDemand" button. You can check the "Keep me logged in" box to remember your login after you close the window.
Logging in (Click to enlarge)
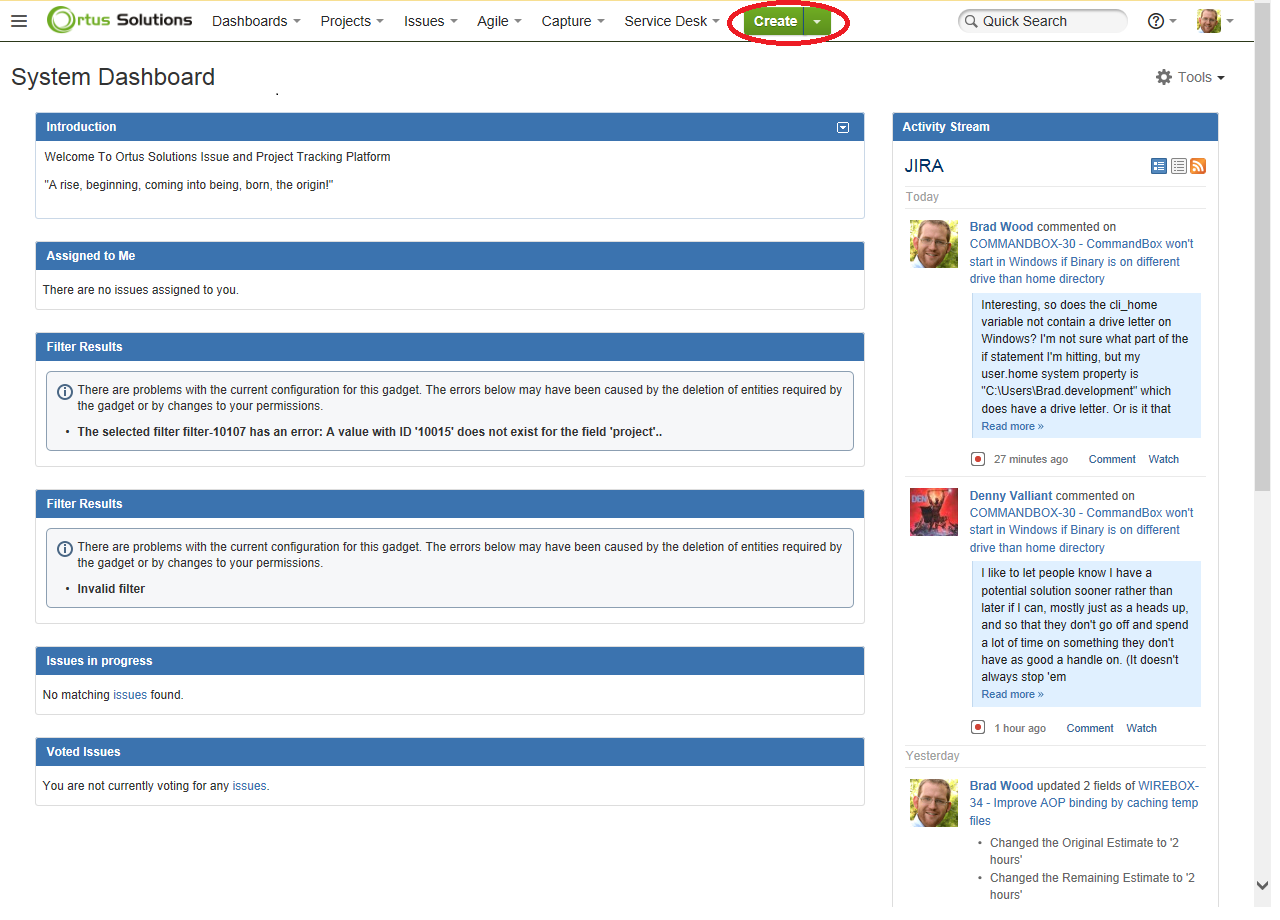
Upon logging in you'll find yourself at a dashboard much like this one. To create a new ticket, click the green "Create" button at the top of the page. Before entering a ticket, make sure you search to see if there's a similar list, or ask on our Google Group.
Logged in (Click to enlarge)
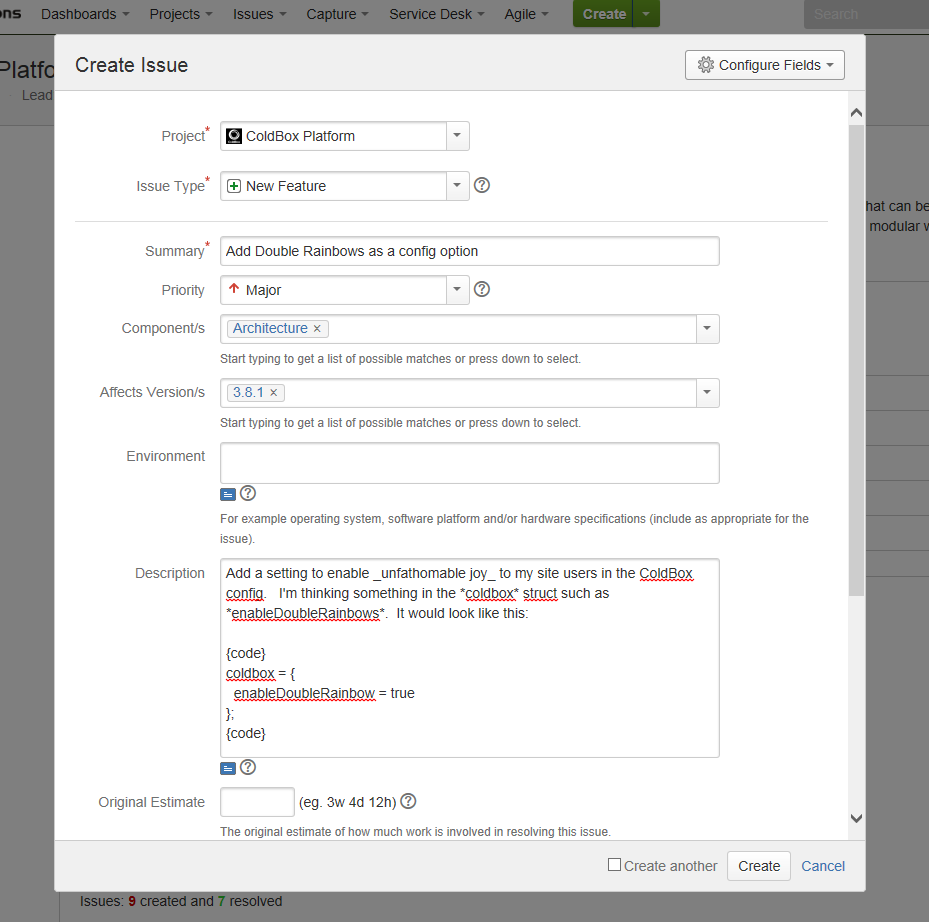
There are a number of fields on this popup, but the most 3 most important are "Project", "Summary" and "Description". Example projects are Coldbox, ContentBox, WireBox, TestBox, CommandBox, etc. Choose the most appropriate one. Try to make the summary as descriptive as possible-- it's the main text that shows up on reports and release notes. Provide as much information as you can in the description. If you think you have a possible fix already mention that. You can also link to forum discussions or GitHub pull requests. For any other fields you're not sure about, just leave them blank and we'll fix them in later. Click the white "Create" button on the bottom of the popup to finish.
Create Ticket (Click to enlarge)
You may have noticed that my description above has some interesting stuff in it, like asterisks (*) or underscores (_) around some text, and {code} blocks around my code sample. There is a bunch of cool JIRA formatting you can use. Click the small blue rectangle by the bottom left corner of the description to preview your message. The little question mark in a circle next to it gives you formatting help. Other useful formatting is to do an unordered list by starting lines with "* " or an ordered list by starting each line with "# ". Here's what the above description looks like with formatting.
Formatted Description (Click to enlarge)

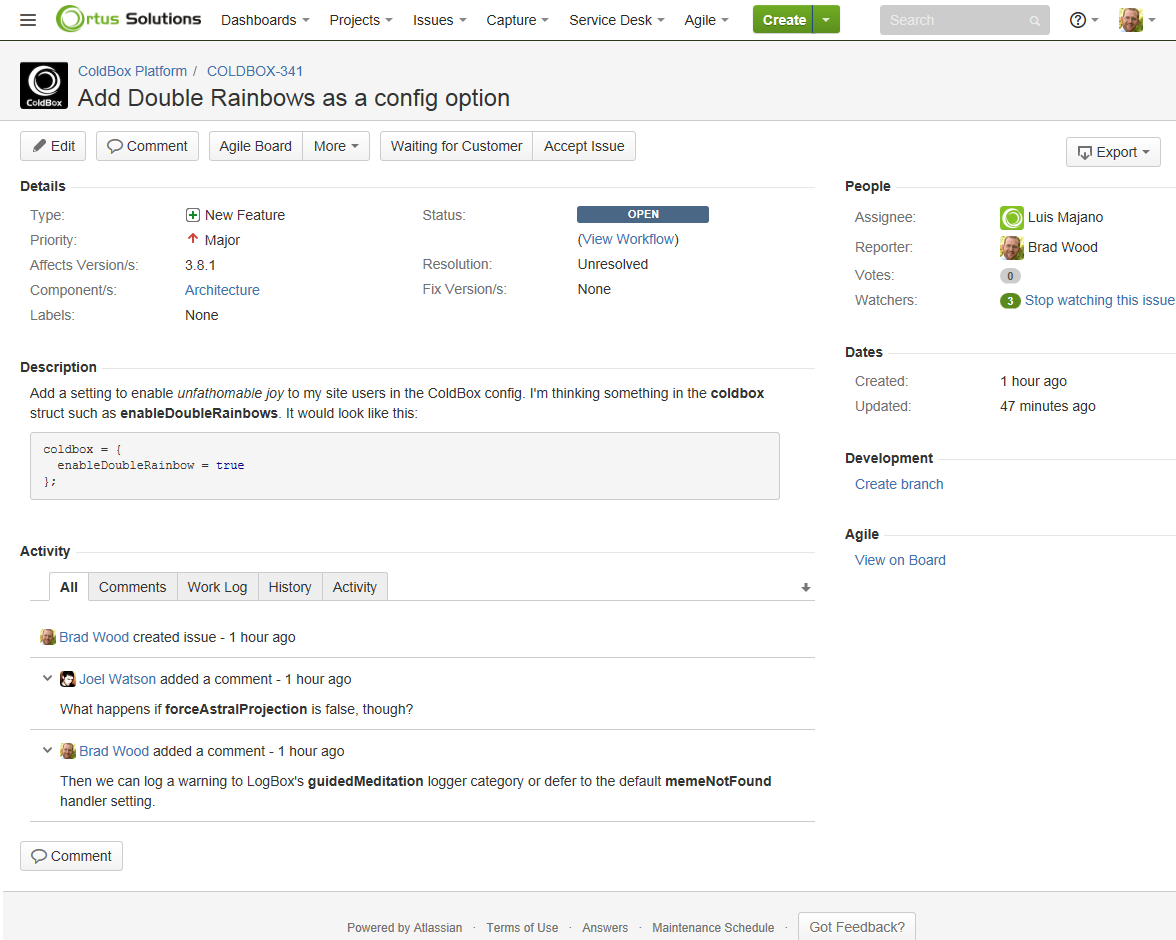
Once you've created your ticket, there will be a message that appears at the top of the screen that gives you the ticket number and is a link to view your new ticket. The "Issues" menu also is a dropdown that shows you the last few tickets you interacted with. Here you can comment on tickets, edit your OWN tickets, as well as watch (subscribe to notification) and vote on tickets. Don't be shy about leaving extra feedback on any ticket in the comments.
View ticket details (Click to enlarge)
There you have it. You're well on your way to becoming a contributing member of our project community. We look forward to hearing from you!


Add Your Comment